Wednesday, September 16, 2015

Jewelry Box: Lower Tray Dividers


Unless I had some way to separate all the various bits of - well - jewelry; some dividers of some sort; then the lower tray I had built would not really be anything more than an inverted shoebox top! Little more than a junk drawer. A fancy Teak junk drawer but still, just a junk drawer.

To come up with some dividers to install into the lower tray that were more interesting than - well - a few sticks, I wanted to create a glue-up of alternating Maple and Walnut.


I started by turning my boards, Walnut on the left, Maple on the right, into small strips at my table saw. Unlike when cutting the strips for the tray sides out of the Teak slabs, this time I didn't care if each strip was the same width or not. In fact I went out of my way to make sure the strip widths were more or less random.


With the boards turned into strips I then stacked those strips, alternating a Maple then a Walnut then a Maple and so on, taking care to select stick widths randomly.

If I would have just settled for dividers with perpendicular laminations, then at this point I could have just glued everything together and been done with it, but I wanted the laminations to run at an angle to create more interest.

An admirable thought perhaps, but it created a whole lot of extra steps!!


First I had to turn my long sticks into lots of shorter sticks. There actually was some science to selecting the length of these sticks. It was ultimately dictated by the final angle of laminations and the width of my surface planer but I won't go into the specifics now since it's much easier to see what that's all about later.


Then I divided those stacks of short sticks into even smaller stacks of about 8 sticks each. It was very important to ensure that each small stack consisted of an even number of sticks so that when the the stacks were joined back together again the alternating pattern of Walnut - Maple - Walnut would remain intact.


Glue was then applied to one side of 7 of the sticks. If glue was applied to the eighth stick it would try it's damndest to glue itself to the clamp and - well - having been-there-done-that before, believe me, it's a less than desirable outcome. . .

Some time back one of the wood magazines ran a test on gluing methods. One method, and clearly the simplest, was to just lay a bead of glue down and then let the pressure of clamping the joint spread the glue. A second was to evenly spread the glue across both gluing surfaces then clamp. And the third was to evenly spread glue across one of the surfaces and clamp.

The results clearly showed that the bead and clamp method was not as strong as the spread and clamp. (The test being that the wood fibers break before the glue joint fails.) The tests also showed that spreading glue on one surface then clamping consistently produced a joint at least as strong as spreading it across two surfaces before clamping. The exception would be very porous woods that tend to wick moisture deep into their fibers, such as the well cooked and tortured surfaces of most plywoods or very oily woods where glue needs to be massaged into the fibers of both surfaces before clamping, such as Teak. In those cases spreading glue on both surfaces first produced a better joint. Since I was working with glue-friendly hardwoods the one-surface method was just fine.

There's all kinds of glue applicators out there designed to make this job easier and I've owned several of them at one time or another, but I find the quickest, neatest and most accurate way to spread glue is with my finger. I lay a bead of glue down the surface then evenly spread it with my finger, making sure I get complete coverage.


Once the glue was spread I reassembled the sticks into a stack and then clamped them up. I applied three of my Bessey clamps to each stack which ensured even pressure across the full length of the relatively thin and flexible sticks.

As I added clamps I snugged each up gently then pushed everything tight against the relatively flat surface of my workbench to get as flat a glue-up as possible. (I wasn't going for perfect which is good because I don't care how much effort you put into it, there is no such thing as a perfect stack glue-up!) I also kept an eye on the ends of the sticks to make sure they lined up reasonably well, though that was not terribly critical since the ends would be cut off and discarded later in the process.

Once I had everything generally in place I carefully tightened the clamps bit by bit to their final pressure, which isn't he-man-gorilla tight since that tends to squeeze so much of the glue out you end up with a dry joint, which is a weak joint.

Depending on the type of joint, I shoot for snugging the clamps up firmly then give them another quarter to half turn. The trick here is to get a sufficiently tight fit between the surfaces for a strong glue line then hold everything in place until the glue has a chance to set. You're not trying to squeeze the sap out of the wood like it was a sponge!


I set each of my glued-up stacks aside overnight to make sure they were well cured before the next step.

Because of my limited number of Bessey clamps it took two days to glue up all eight of these small stacks.


At this point there was a lot of glue squeeze-out, which isn't necessarily a bad thing. If you don't see at least some squeeze-out then the joint is potentially dry and could be weak.

The surface of the stack is far from perfectly even, especially the surface that was on top during the clamping phase since my Walnut board was slightly thicker than the Maple to start with, but not to worry, that will be dealt with soon.


The next step is to knock some of that excess glue off with a scraper. I've tried a lot of different ways to do this and for me the one that seems to work best most of the time is using a hand scraper with a replaceable carbide edge.The replacement edges are not that expensive and glue, especially glue blobs, can be hard on sharp tools, so getting rid of what you can before subjecting your expensive blades to it is a good idea.


With the worst of the excess glue removed I moved over to the jointer. I have an 8 inch jointer which was one factor dictating the maximum width of my initial stacks.


A quick pass or two of what was the bottom side of each stack during clamping, the most even side, through the jointer evened everything up and left me with nice predicable surfaces for the next step.

I left the other side of the stacks rough because it will be a couple more steps before I'm ready to worry about them.


I decided to take the easy way out and go for laminations set at 45 degrees. This way I could turn the resulting dividers end for end all I wanted without screwing up the pattern.


I used my speed-square to get me in the ballpark. It was also important at this point to ensure that ultimately I would be dealing with a 12" to 13" wide final glue-up since I have a 13" planer that the whole thing would have to fit through at some point.


Then I marked the 'ends' to make sure I could get everything back where it needed to be, (If you look close you can see the pencil ticks near the left side of the two closest stacks.) as well as give me a guide when I was spreading the glue. It was very important that I keep the smooth side down against the bench at this stage and I also had to guard against flipping any of the stacks end for end or I would have ended up with Maple - Maple or Walnut - Walnut sticks adjacent to each other at the new glue line.


Just like when I glued the sticks into stacks, I then glued the small stacks into larger stacks, but only a maximum of three per glue-up to ensure I could keep control and get good alignment and clamping pressure.

At this point I didn't have to be quite as close with the clamp spacing since the glued up stacks are much stiffer, I mean way stiffer, than the original sticks, so clamping pressure would be distributed over a wider area. (It's the difference between pushing down in the middle of a pillow or the middle of a board. The floppy pillow won't transfer any of the pressure out to the ends but the stiffer board will.)

This turned my 8 initial stacks into 3, 2 of three stacks each and 1 of two stacks. (OK, if you stuck with me on that you're doing well. I had to proof that sentence several times to make sure I got it right!)

Again, I left the glue-ups to cure overnight.

You can also see that by now I was getting better at judging just how much glue these particular joints needed so there was much less squeeze-out. Just enough that I knew the joint wasn't dry.


But I wasn't done yet!  The next morning I took my two new three piece stacks and glued them up into an even larger, 6 piece stack, taking great care to maintain the offset that would result in the 45 degree laminations I wanted.


Because of curing time I had to wait until the next morning to glue on the final stack required to create the ultimate 8 piece stack.


The next step was to turn my jagged 8 piece stack into a nice regular-shaped board I could work with.

I started by striking a reference line down the full length of the final glue-up 45 degrees relative to the base of the glue-up (For my purposes the base is the edge closest to the bottom right of the photo above.)

Using that reference I stuck another line parallel to it that just touched the bottom of the notches along the left edge. This didn't touch each notch-base exactly due to variances during the glue-up, but it was close enough to give me a point to work towards.


Because the protruding points of the original stacks didn't all line up perfectly due to those variances I just mentioned, I began to slowly nibble them away at the table saw by setting the fence about a half inch from the blade and guiding the tips as evenly as I could along it and through the blade. Each pass got me closer to where I needed to be, a nice straight cut, and after a few passes I had a pretty straight cut going down the edge. By checking against my reference lines I could see I was still on track for the 45 degree cut I was after.


I was then confident enough to move the fence over and take a larger cut along my outer reference line. Once that was done I turned the stack end for end, adjusted the fence, and cut the peaks off the other side in one pass. One more flip to trim a final sliver off the initial edge and I had a glued up stack with two clean,  parallel edges to work with.


I was so excited at this point I screwed up and sliced a couple blanks that would ultimately be turned into dividers off the stack before I remembered I still needed to run it through the surface planer to true up the top and bottom. Fortunately I had made my glue-up much larger than actually needed so I didn't have to deal with the painful process of trying to even out those two initial blanks too. Small pieces are a pain to work with so I try to keep everything as large as possible as long as possible.


So anyway, all the calculating and measuring I did to ensure a stack as wide as possible but still able to fit through my planer was for naught, since now my stack was more than narrow enough to fit through the planer.

A couple of light passes on each side and my stack was finally nice a clean and straight all the way around.


Then it was back to the table saw to cut two more 7/16s blanks off the stack. I then cut those long blanks into shorter sections a little longer than the final pieces needed to be.

Two slices off the big stack was way more than needed for the jewelry box but the original Walnut and Maple boards were only about 3/4" thick and I felt that the rails needed to be slightly taller than that. To do that I was going to stack two pieces on top of each other then trim it down to the height I actually wanted. In order to keep the random width laminations lined up when I did this I needed to have the two pieces come from matching sections of the two adjacent blanks.


While I was handling the paired pieces I discovered that if I turned one of them 90 degrees and then glued them together in just the right alignment the resulting divider would be plenty high enough for what I wanted and it put a neat looking kink into the pattern, so I went with that instead of my original plan.


Since the strips were taller than wide this left a little excess overhang on one side that I trimmed off at the bandsaw, guiding the blade freehand down the edge of the vertical part of the assembly.


That narrow cutoff there on the right is what I ended up inlaying into the sides of the upper trays.


After trimming off the bottom to the height I wanted, I knocked the top corners of the dividers off with a hand plane.


Then a little sanding, by machine initially to rough out the shape then by hand down through the grits cleaned and polished the rails yet left each one slightly unique to avoid the whole mass-production look.

Here's an example of how my decision to turn one of the pieces 90 degrees before gluing resulted in two different looks. Standing up in the background of the photo above you can see the side that looks like it has a kink in it where each wood seems to bend around a 45 degree corner. Laying on their sides in the foreground are rails showing the other side where the pattern doesn't flow but appears interrupted. To my eye either way looks pretty interesting, more interesting that just a straight-line pattern.


So now all I needed to do was trim the rails to their final length, which I didn't do until just before installing them.

Tuesday, September 1, 2015

Jewelry Box: The Trays

The actual work flow didn't go this way, but for the sake of clarity (Of course clarity is a relative term!!) I've broken down constructing the jewelry box for sister L to give to sister G into it's main components.

This post will deal with the trays themselves.


But first, this was the starting point for the actual cutting and fitting part of the project. Over on the left are a couple chunks of Black Walnut. There in the middle are some boards of Tiger Maple. I bought these sight-unseen as Birdseye Maple but actually like the Tiger Maple I ended up with better. And over there on the right is a $200 chunk of 8/4 Teak.

All of the above has been on the rack in my shop for years, being slowly nibbled away at as I build various projects.

Not shown is a bit of left over hardboard (Masonite) that I cut the bottoms of the trays out of and, because it would have been a bit cumbersome to carry into the shop and hoist up onto the table saw, the 50 foot Redheart Cedar tree that gave up a few fire-wood sized blanks that I turned into a whole lot of shavings at the lathe in the process of producing a few rails for the small trays.

The tree had succumbed to beetles after being weakened by our multi-year drought. Then when the rains did return this spring the dead tree didn't have enough hold on the ground to stay up on its feet any longer.


First step to building the trays was to rip a couple slices off the Teak slab that would eventually become the tray sides. That chunk of Teak is heavy and when taking off thin slices like this I prefer to keep them on the free side of the blade rather than risk having them trapped between the blade and the fence. This takes a little more setup in order to get each slice about the same thickness because I have to adjust the fence for each cut and that's more art than science, but I would be running the slices through the planer anyway to clean up saw marks and save myself some sanding, and while I was doing that the planer would also trim them up to the same thickness.

At this point I hadn't yet discovered that I would be building a second small tray so I had to come back later and do this all over again to get one more slice. . . .


Since the stacked trays had to fit within the depths of a 3.5" drawer I couldn't use the entire 2" width of the slices I just produced so I trimmed a little off the slice that would become the bottom tray, (But not enough as it turned out!) and a wider bit off the slice that would become the shallower upper tray.


With the tray sides now the right height I installed a flat-kerf blade in my table saw. As you might have already figured out, this is a blade designed to leave a flat bottomed cut rather than the more usual M shaped bottom normal crosscut and ripping blades would leave. It's a little detail that will never be seen but - well - might as well do it right, or at least try once in a while. . .

After a little bit of careful setup (And a slight detour as I fished one of my brass setup bars from the bowels of the table saw.) I cut the dadoes that would ultimately hold the hardboard tray bottoms.


Next step was to rough-cut the sides of the trays out of the long pieces I had been working with, making absolutely sure to cut them a little long.  Then I tilted the blade to 45 degrees and carefully trimmed them to final length while mitering them at the same time.

In the setup above I've mitered one end of all four pieces that make up the ends the bottom tray and the long sides of the upper tray, all of which are the same length. Using my speed square (With a brass setup bar holding the far end up so the pointy ends of the 45 degree miter cuts would butt flush against the square) up against my highly accurate Osbourn miter gauge, I lined up all four pieces before running them through the saw one last time.

This ensured they all came out square (In a mitered kind of way.) and the same length, both of which are pretty important when you're trying to end up with a square box. In fact having all the same length is more important than their actual length. I did this two more times to get the ends of the small tray and the sides of the lower tray cut to equal lengths as well.

At this point I was still working under the delusion that I was only building one small tray, so later I had to do all of this all over again to produce the second small tray. . .


The photo above shows all four sides of the first small tray, milled, dado-ed, and mitered. Laying on top of them is a thin slice from the glue-up I did to create the rails for the bottom tray. (That's another post yet to come.) And there in the top center of the photo, my dado stack set up so I can inlay the walnut/maple glue-up into the tray sides.

It wasn't until I had this thin piece of the walnut/maple glue-up laying on the table saw, a scrap bit of off-cut at this point, that the 40 watt bulb in my head finally warmed up enough for me to notice. 'Hey! this would make a cool looking inlay around the outside of the small tray!'

Now believe me, this would have been a whole lot simpler if I had just planned on doing the inlay from the start, but my projects often evolve along the way so this wasn't the first time I've ended up doing things backwards.


Once the inlay dado was cut and the strips carefully edge-sanded until they fit snug, I glued everything in place, stacking the glue-ups together with waxed paper keeping parts that weren't supposed to stick together from sticking together. This way I could put clamp pressure on all the glue-joints with just four of my Bessey clamps.

These are great clamps that apply a nice even, parallel pressure across a wide area, but they are expensive so my supply is limited.


I cut the depth of the dado so the the inlay would sit slightly proud of the tray sides when glued in place. That way they could later be sanded down flush and ensure a clean, tight look.

Here I've got one of the tray sides clamped in the bench vice and rough sanded down flush, with another side next to it waiting for the same treatment.

After rough sanding with 100 grit in a small belt sander to quickly remove the bulk of the excess, I hand sanded down through the grits, 150, 220, 320 until I reached 400.  This leaves a velvety smooth surface that will take a clear finish nicely.

But I should point out that I don't get obsessive about the sanding, nor do I fall apart over the occasional less than perfect fit and finish. I think a hand built piece is enhanced by having a few flaws left over from the process. If you must have cookie cutter perfection then go to Walmart and buy mass produced plastic instead.


The biggest problem with doing the inlay backwards like this was that I now needed to go back and trim the inlay flush with the finished miters I had already done. This requires a lot of very careful and painstaking work since the last thing I wanted to do was accidentally cut too much off one end of one of the pieces! That would mean the tray wouldn't fit together square anymore and - well - it's kind of important that they fit square!!

I very carefully lined thing up by eye and cut close while not overcutting, then took advantage of the fact that the carbide teeth on the saw blade stand slightly proud of the steel body of the blade.

By carefully butting the cut face up to the steel of the blade, holding everything tightly in place, then running that setup through the spinning teeth, I could shave very thin slices off the inlay until I got it down flush with the miter cuts. This takes a lot of time since the blade must be stopped and restarted for every pass and the setup must be done carefully, but - well - it was my own fault I was in this fix. . .


This is a closeup of the finished result. And I only had to do it all over again seven more times!!  Note to self, it sure is easier if you do things in the right order in the first place!

Here you can also see the radius I sanded into the top of the tray sides while doing the hand sanding a couple steps ago. A hand built piece should invite handling and nothing disturbs the tactile experience like unnaturally sharp edges.

Speaking of tactile, when building boxes it's important to sand the inside before assembly as it's nearly impossible to try do it once the parts are assembled and you have to work against inside corners.


But once again, I was working ahead of myself.

Once I got the lower tray assembled I decided the whole thing was just a little too deep, so I ended up cutting about 5/16th off the top all the way around. Of course this included the radius I had so painstakingly put on, so I had to hand sand that back in all the way around. . .


Since the tray was already assembled at this point that meant I had to deal with getting a decent looking radius at the inside of the four corners as well as along the edges. I did this by wrapping sand paper around the handle of a small paintbrush and carefully shaping the corners, down through all 5 different grits of sandpaper!


Sanding is rarely the most sought after job in the woodshop, but if there was any bright spot to this at all, it's that the oily Teak produces a heavy sanding dust that simply lays down instead of floating around everywhere.

But still, note to self; stop doing things backwards or I'm going to have to dope-slap you!!!!


In the photo above I'm setting up to glue up one of the trays. The tray bottom, sitting top right, has been cut to size so it fits into the assembled sides with just a little extra room left over to account for wood-movement over time. It won't generally be seen, but I went ahead and pre-painted the underside of the bottom black anyway because you never know.

The sides are laid out there on the lower right and I've already done a dry run to get my strap clamp set up and ready to go.

If you're going to make more than a few small boxes a strap clamp like this sure does make things easier. It's a bit finicky to get all the bits where they need to be, but once that's done it can be gently snugged up to hold everything in place while you make last minute adjustments, then quickly and cleanly applies even pressure all the way around with a couple twists of the red handle that's just barely visible on the left.

 Teak is an oily wood, so before any glue goes on I wipe the gluing surfaces down well with acetone. This temporarily clears some of the oil out of the way and allows the glue to get a decent grip on the wood fibers. The oil will soon migrate back but by then the deed is done.


Once I have the oils cleaned up a little so the tape sticks better, I carefully mask the inside corners before reaching for the glue bottle in case there's any squeeze-out once I clamp things up.

Squeeze-out is easy to clean up on the outside but a real bitch on the inside!

By carefully timing it right, I can remove the tape, and any squeeze-out right along with it, just at the point where the glue is hard enough to stay put but soft enough to remove cleanly. This takes patience because if you do it too soon you end up with a mess anyway, yet if you get distracted and put it off too long the glue has hardened to the point where it will take a lot of careful work with a fresh #11 blade to get it all cleaned up without damaging anything.

I tend to leave glue-ups clamped overnight. This is longer than most modern adhesives need but at this stage I prefer to play it safe.

Once the clamp came off a final round of sanding on the outside cleans things up and eases the sharp corners.

Just because the trays are now assembled doesn't mean I'm done though.

Next time, the process of gluing up the blank from which I then cut the rails for the bottom tray (And the inlay for the small trays.)


Monday, August 24, 2015

Jewelry Box: Concept


While at a family gathering recently (see here, here, and here if you want the gory details.) one of my sisters, let's call her L, pulled me aside several times for some highly secret discussions. My other sister, let's call her G, had a birthday coming up and sister L wanted to present sister G with a new jewelry box; and she wanted me to make it.

Like highly skilled secret agents, sister L and I had several clandestine meetings and some highly classified  photos of the existing jewelry containment system were even exchanged, all without sister G, or anyone else at the three day reunion, having a clue.

Normally when you think custom jewelry box the custom is on the outside, but in this case the 'box' would be living inside a vanity drawer and is actually more of a tray than a box. Since it would be living down inside a drawer the outside of the box would be pretty much hidden and there would be no top to gussy up, so I had to focus any fancy details on the inside of the tray instead.

After a little back and forth between myself and secret agent sister L this is the concept I drew up.


One large tray to sit in the bottom of the drawer with a smaller tray sitting on top of that. The small tray can be slid forward or back to access all of the bottom tray.

The trays themselves are made of Teak.

The rails in the bottom tray are an alternating laminate of Black Walnut and Tiger Maple.

The rails for the top tray are Red Heart Cedar rings turned on the lathe.


And the whole thing sits in the drawer something like this with enough room at the back of the drawer to accommodate the few odds and ends sister G keeps back there.


With me there's always a little bit (Sometimes a lot!) of play between concept and finished piece and this was no exception.


As you can see, I added a second small tray and eliminated the row of small compartments in the lower tray. I did this after I got concerned about the number of post type earrings sister G has and found through experimenting that reaching down into small compartments in the lower tray for them was a bit awkward. (Almost as awkward as that sentance!)

While I was at it I added an inlay band around the outside of both the small trays which will be visible when they are lifted out of the drawer (One handed via the turned knobs I added to them.) to access the lower tray.

If you're into that sort of thing, over the next several posts I'll be going into more detail on the construction of this jewelry 'box'.


Friday, July 17, 2015

Archeology


Or is is geology??

Anyway, whatever it is. . . .

I was working on a project in the shop this morning when I dropped something down inside my table saw.


 It was one of my brass setup-bars. Bars that are machined to very accurate dimensions in increments of 1/16th of an inch. In this case I was using the 2/16's bar to set up a shallow dado cut on the table saw.


Now it just so happens that the width of the saw blade I was using is 1/8th of an inch, and that's also the width of the slot in the zero-clearance insert through which the blade protrudes. (Actually, since the insert is old and has been victim of blade vibration a few times the slot is a little wider than 1/8th inch in a few places.)

I'm sure you can see where this is going.

I had just finished setting the blade height using the setup bar by running a fingernail back and forth across the top tooth of the blade and the setup bar, adjusting the blade height until my fingernail didn't catch going either way. I went to get the bar out of the way, (brass or not, it's not something you want the blade to be hitting!) but instead I performed a very neat, but unintentional, 2-pointer by dropping it right down through the slot.


Like many, I can't afford or justify a high-end cabinet saw for my shop, so instead, many years ago, bought a decent contractor's saw, removed the legs and built my own cabinet around it. What can't be seen in the photo above is the 4" PVC pipe slung under the saw which connects to my dust collection system and pulls sawdust from the chamber directly below the saw itself.

This is where my setup bar went, right down into that chamber, and the last place I wanted it to end up is in the dust-collector after going through the 2 horsepower steel impeller!


Fortunately I had enough foresight at the time I built the cabinet to install a hatch into this chamber which is held in place with 4 screws that can be removed quickly.

As you can see, the spiders and I live cooperatively in the shop. For the most part they don't seem to mind me all that much and I'm not bothered by them

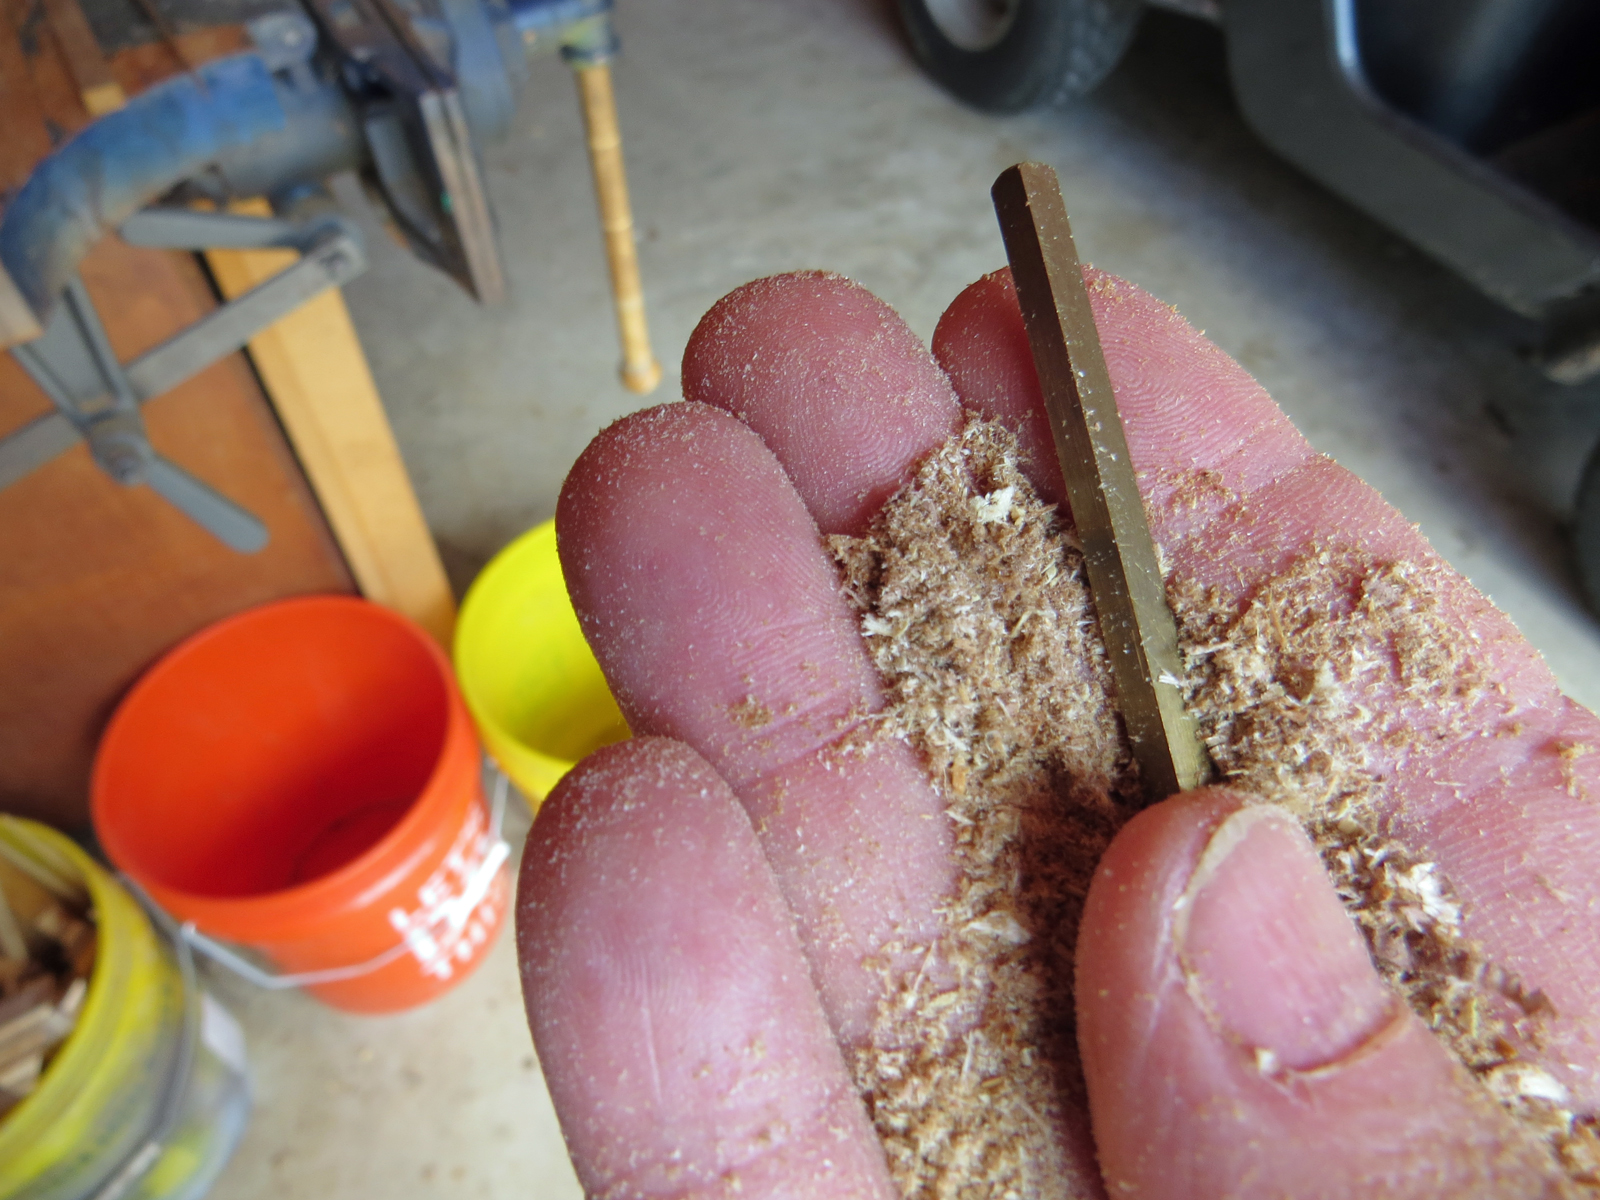
When I did that today I found sawdust piled up against the opening and in the layering of that sawdust a clear record of my past and current projects. I'm sure that with mass-spectrometer and a little lab time, a CSI could match sawdust to specific projects and use the layering to put a timeline to them, but since Abby of NCIS isn't in the habit of dropping by my shop, (Not that I would mind that Abby, if you happen to be reading this and don't mind lecherous old men!!) I'll have to leave that for another time.

This photo was taken by turning on the flash and blindly extending the camera through the small space left by the piled sawdust.
Using a flashlight through the insert opening in the top of the saw table I already knew that the bar had fallen, unerringly, all the way through the chamber and into the PVC pipe at the bottom.


I was afraid that if I just shoved the historical record of my work on in and out of the way, it would fall right on top of the setup bar and I'd be sitting on the floor of the shop sifting through a big pile of sawdust for hours. Fortunately there was just enough room for me to snake my arm in past the obstruction and eventually fish the bar out of the depths of my saw. . .

Now, where was I when I was so rudely interrupted by my own fumble-fingers??


Monday, July 13, 2015

Wardrobe malfuction!

Here it is, my 100th post on this blog, and it comes about due to a wardrobe malfunction!

Over the past few days I've been putting in some bench time working on the preliminary stages of a project. This particular project has a lot of glue-ups that require several hours of cure time during which I can hang up my gear, kick back and recover from my heroic efforts. (As I'm writing this up I'm also waiting out another cure time.)

When I came back to the bench after one of these cure/recovery times I found my shop apron laying on the concrete floor of the barn.


'Well that's strange' I thought. When not actually wearing it the apron hangs on the outside of my storeroom door, which, truth be told, if very rarely ever actually closed. This leaves anything hanging there at the mercy of the winds that sometimes whip through the barn when I have the doors at both ends open, which is pretty much all the daylight hours.

I also keep a long apron hanging there that I wear when I'm working at the lathe, along with a throw-away pair of old pants I don't mind getting paint, oil and other gunk on, as well as a lightweight, long-sleeved shirt where I can grab it when I need protection from the often intense Texas sun. The shirt is usually the one that gets blown off the nail, not the apron. In fact this would be the first time ever either of the heavy aprons had blown off it's nail.

(Contrary to what westerners seem to believe, bare skin is not the proper response to hot, sunny conditions! If you don't believe me just go lay your hand on the hood of that old truck sitting out back. Not only has the UV faded and cracked the paint, but the dang thing is hot isn't it! So tell me, just how is that any different from your exposed skin? Unless it's protected with a lightweight layer of cloth that can deflect the solar energy and stop the UV rays, such as desert dwellers the world over have been doing for thousands of years, how is your skin in the sun any different than that truck in the sun?? Other than the fact that that the truck can't die of heat exhaustion nor contract skin cancer.)

Only turns out nothing had blown off of anything, instead one of the webbing straps had failed. Don't ask me how. It doesn't really look like it's been cut, the edges are just a little too raged for that, but there's also no sign of excessive wear at that point either.


Oh well. Whatever the cause it needs to be fixed.

Because of it's location I couldn't just overlap the two ends and staple them together. (Yes, I admit it. That was the first fix I thought of.) This would have made the two straps down to the top of the apron lopsided. Now I know none of us are perfectly symmetrical, least of all me, but I'm not that crooked!

So a little hunting through some scraps turned up a bit of webbing of the right width. True, it wasn't the right color, but just who am I trying to impress anyway?!


I temporarily put my current project on hold and cleared it off the bench to make way for the sewing machine. The machine just happened to have lime green thread in it from whatever the last sewing project was. True, I could have rummaged around and found the black thread I know is in that bag somewhere, but again, who cares?


I butted up the two ends of the original webbing so they would stay the same overall length and then tacked on a short length of new webbing to bridge the gap and I'm good to go again. (Though since I butted the ends up tight, technically there was no gap to bridge so. . . Oh never mind.)

Thankfully I didn't expose anything - well - horrible, during this wardrobe malfunction or I might have been liable for some unfortunate observer's lifetime of therapy!!