Monday, August 24, 2015

Jewelry Box: Concept


While at a family gathering recently (see here, here, and here if you want the gory details.) one of my sisters, let's call her L, pulled me aside several times for some highly secret discussions. My other sister, let's call her G, had a birthday coming up and sister L wanted to present sister G with a new jewelry box; and she wanted me to make it.

Like highly skilled secret agents, sister L and I had several clandestine meetings and some highly classified  photos of the existing jewelry containment system were even exchanged, all without sister G, or anyone else at the three day reunion, having a clue.

Normally when you think custom jewelry box the custom is on the outside, but in this case the 'box' would be living inside a vanity drawer and is actually more of a tray than a box. Since it would be living down inside a drawer the outside of the box would be pretty much hidden and there would be no top to gussy up, so I had to focus any fancy details on the inside of the tray instead.

After a little back and forth between myself and secret agent sister L this is the concept I drew up.


One large tray to sit in the bottom of the drawer with a smaller tray sitting on top of that. The small tray can be slid forward or back to access all of the bottom tray.

The trays themselves are made of Teak.

The rails in the bottom tray are an alternating laminate of Black Walnut and Tiger Maple.

The rails for the top tray are Red Heart Cedar rings turned on the lathe.


And the whole thing sits in the drawer something like this with enough room at the back of the drawer to accommodate the few odds and ends sister G keeps back there.


With me there's always a little bit (Sometimes a lot!) of play between concept and finished piece and this was no exception.


As you can see, I added a second small tray and eliminated the row of small compartments in the lower tray. I did this after I got concerned about the number of post type earrings sister G has and found through experimenting that reaching down into small compartments in the lower tray for them was a bit awkward. (Almost as awkward as that sentance!)

While I was at it I added an inlay band around the outside of both the small trays which will be visible when they are lifted out of the drawer (One handed via the turned knobs I added to them.) to access the lower tray.

If you're into that sort of thing, over the next several posts I'll be going into more detail on the construction of this jewelry 'box'.


Friday, July 17, 2015

Archeology


Or is is geology??

Anyway, whatever it is. . . .

I was working on a project in the shop this morning when I dropped something down inside my table saw.


 It was one of my brass setup-bars. Bars that are machined to very accurate dimensions in increments of 1/16th of an inch. In this case I was using the 2/16's bar to set up a shallow dado cut on the table saw.


Now it just so happens that the width of the saw blade I was using is 1/8th of an inch, and that's also the width of the slot in the zero-clearance insert through which the blade protrudes. (Actually, since the insert is old and has been victim of blade vibration a few times the slot is a little wider than 1/8th inch in a few places.)

I'm sure you can see where this is going.

I had just finished setting the blade height using the setup bar by running a fingernail back and forth across the top tooth of the blade and the setup bar, adjusting the blade height until my fingernail didn't catch going either way. I went to get the bar out of the way, (brass or not, it's not something you want the blade to be hitting!) but instead I performed a very neat, but unintentional, 2-pointer by dropping it right down through the slot.


Like many, I can't afford or justify a high-end cabinet saw for my shop, so instead, many years ago, bought a decent contractor's saw, removed the legs and built my own cabinet around it. What can't be seen in the photo above is the 4" PVC pipe slung under the saw which connects to my dust collection system and pulls sawdust from the chamber directly below the saw itself.

This is where my setup bar went, right down into that chamber, and the last place I wanted it to end up is in the dust-collector after going through the 2 horsepower steel impeller!


Fortunately I had enough foresight at the time I built the cabinet to install a hatch into this chamber which is held in place with 4 screws that can be removed quickly.

As you can see, the spiders and I live cooperatively in the shop. For the most part they don't seem to mind me all that much and I'm not bothered by them

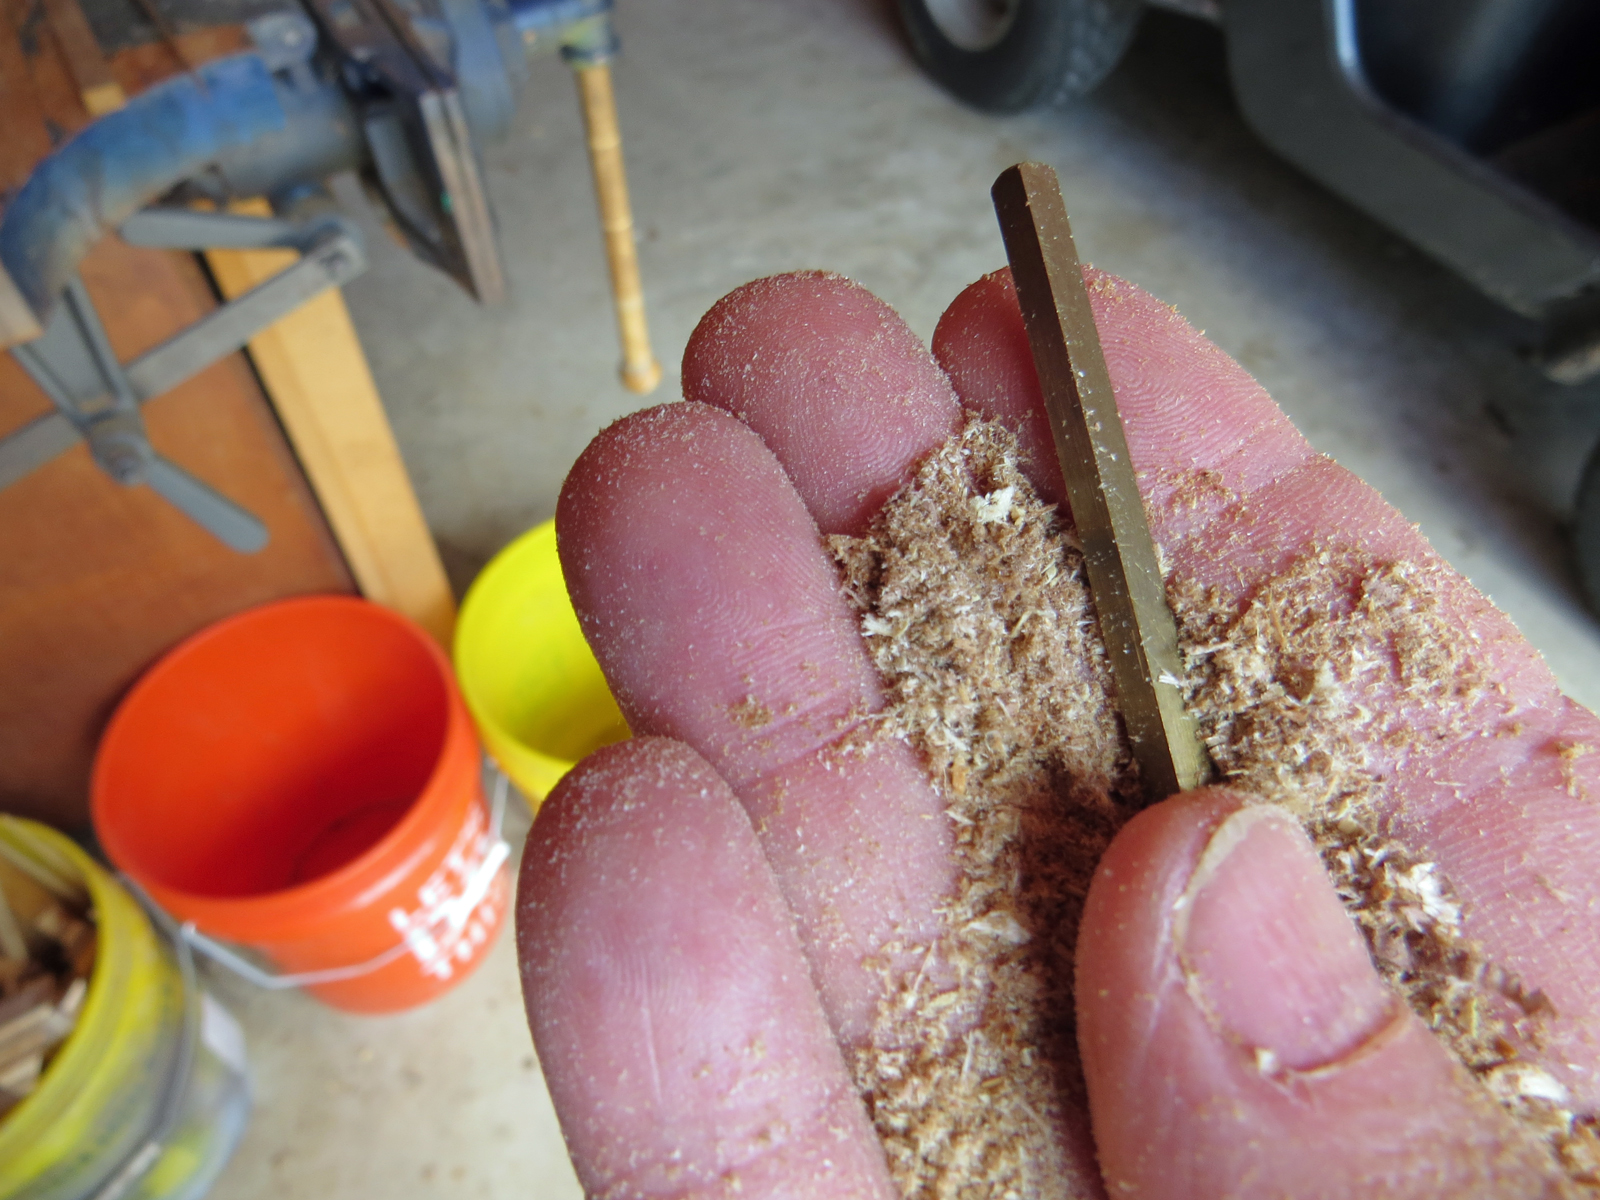
When I did that today I found sawdust piled up against the opening and in the layering of that sawdust a clear record of my past and current projects. I'm sure that with mass-spectrometer and a little lab time, a CSI could match sawdust to specific projects and use the layering to put a timeline to them, but since Abby of NCIS isn't in the habit of dropping by my shop, (Not that I would mind that Abby, if you happen to be reading this and don't mind lecherous old men!!) I'll have to leave that for another time.

This photo was taken by turning on the flash and blindly extending the camera through the small space left by the piled sawdust.
Using a flashlight through the insert opening in the top of the saw table I already knew that the bar had fallen, unerringly, all the way through the chamber and into the PVC pipe at the bottom.


I was afraid that if I just shoved the historical record of my work on in and out of the way, it would fall right on top of the setup bar and I'd be sitting on the floor of the shop sifting through a big pile of sawdust for hours. Fortunately there was just enough room for me to snake my arm in past the obstruction and eventually fish the bar out of the depths of my saw. . .

Now, where was I when I was so rudely interrupted by my own fumble-fingers??


Monday, July 13, 2015

Wardrobe malfuction!

Here it is, my 100th post on this blog, and it comes about due to a wardrobe malfunction!

Over the past few days I've been putting in some bench time working on the preliminary stages of a project. This particular project has a lot of glue-ups that require several hours of cure time during which I can hang up my gear, kick back and recover from my heroic efforts. (As I'm writing this up I'm also waiting out another cure time.)

When I came back to the bench after one of these cure/recovery times I found my shop apron laying on the concrete floor of the barn.


'Well that's strange' I thought. When not actually wearing it the apron hangs on the outside of my storeroom door, which, truth be told, if very rarely ever actually closed. This leaves anything hanging there at the mercy of the winds that sometimes whip through the barn when I have the doors at both ends open, which is pretty much all the daylight hours.

I also keep a long apron hanging there that I wear when I'm working at the lathe, along with a throw-away pair of old pants I don't mind getting paint, oil and other gunk on, as well as a lightweight, long-sleeved shirt where I can grab it when I need protection from the often intense Texas sun. The shirt is usually the one that gets blown off the nail, not the apron. In fact this would be the first time ever either of the heavy aprons had blown off it's nail.

(Contrary to what westerners seem to believe, bare skin is not the proper response to hot, sunny conditions! If you don't believe me just go lay your hand on the hood of that old truck sitting out back. Not only has the UV faded and cracked the paint, but the dang thing is hot isn't it! So tell me, just how is that any different from your exposed skin? Unless it's protected with a lightweight layer of cloth that can deflect the solar energy and stop the UV rays, such as desert dwellers the world over have been doing for thousands of years, how is your skin in the sun any different than that truck in the sun?? Other than the fact that that the truck can't die of heat exhaustion nor contract skin cancer.)

Only turns out nothing had blown off of anything, instead one of the webbing straps had failed. Don't ask me how. It doesn't really look like it's been cut, the edges are just a little too raged for that, but there's also no sign of excessive wear at that point either.


Oh well. Whatever the cause it needs to be fixed.

Because of it's location I couldn't just overlap the two ends and staple them together. (Yes, I admit it. That was the first fix I thought of.) This would have made the two straps down to the top of the apron lopsided. Now I know none of us are perfectly symmetrical, least of all me, but I'm not that crooked!

So a little hunting through some scraps turned up a bit of webbing of the right width. True, it wasn't the right color, but just who am I trying to impress anyway?!


I temporarily put my current project on hold and cleared it off the bench to make way for the sewing machine. The machine just happened to have lime green thread in it from whatever the last sewing project was. True, I could have rummaged around and found the black thread I know is in that bag somewhere, but again, who cares?


I butted up the two ends of the original webbing so they would stay the same overall length and then tacked on a short length of new webbing to bridge the gap and I'm good to go again. (Though since I butted the ends up tight, technically there was no gap to bridge so. . . Oh never mind.)

Thankfully I didn't expose anything - well - horrible, during this wardrobe malfunction or I might have been liable for some unfortunate observer's lifetime of therapy!!


Wednesday, June 3, 2015

Water and wildlife


Some of you might be aware that Memorial day here in Central Texas was a tad wet, to put it mildly.

In fact it was no joking matter when 8 inches of rain fell on Blanco Texas in a few hours and shortly thereafter, at the downriver town of Wimberly, the Blanco River crested at an estimated 43feet. That's estimated because just after the river hit 40' the flood gauge washed away. Flood stage is 13' and a few hours before it crested the river was running somewhere in the 6' range. Uninsured homes in the 500 year flood plain are a total loss. Homes closer to the river just don't exist anymore and as I write this, over two weeks later, several of the missing are still missing despite the efforts of hundreds of volunteers, several search organizations and a few government agencies.

We got 5.65" of rain that day here are our place. But because we are up high the only real flooding we had to contend with was at the several low-water crossings on the roads in and out of here, but we did have plenty of water flowing!

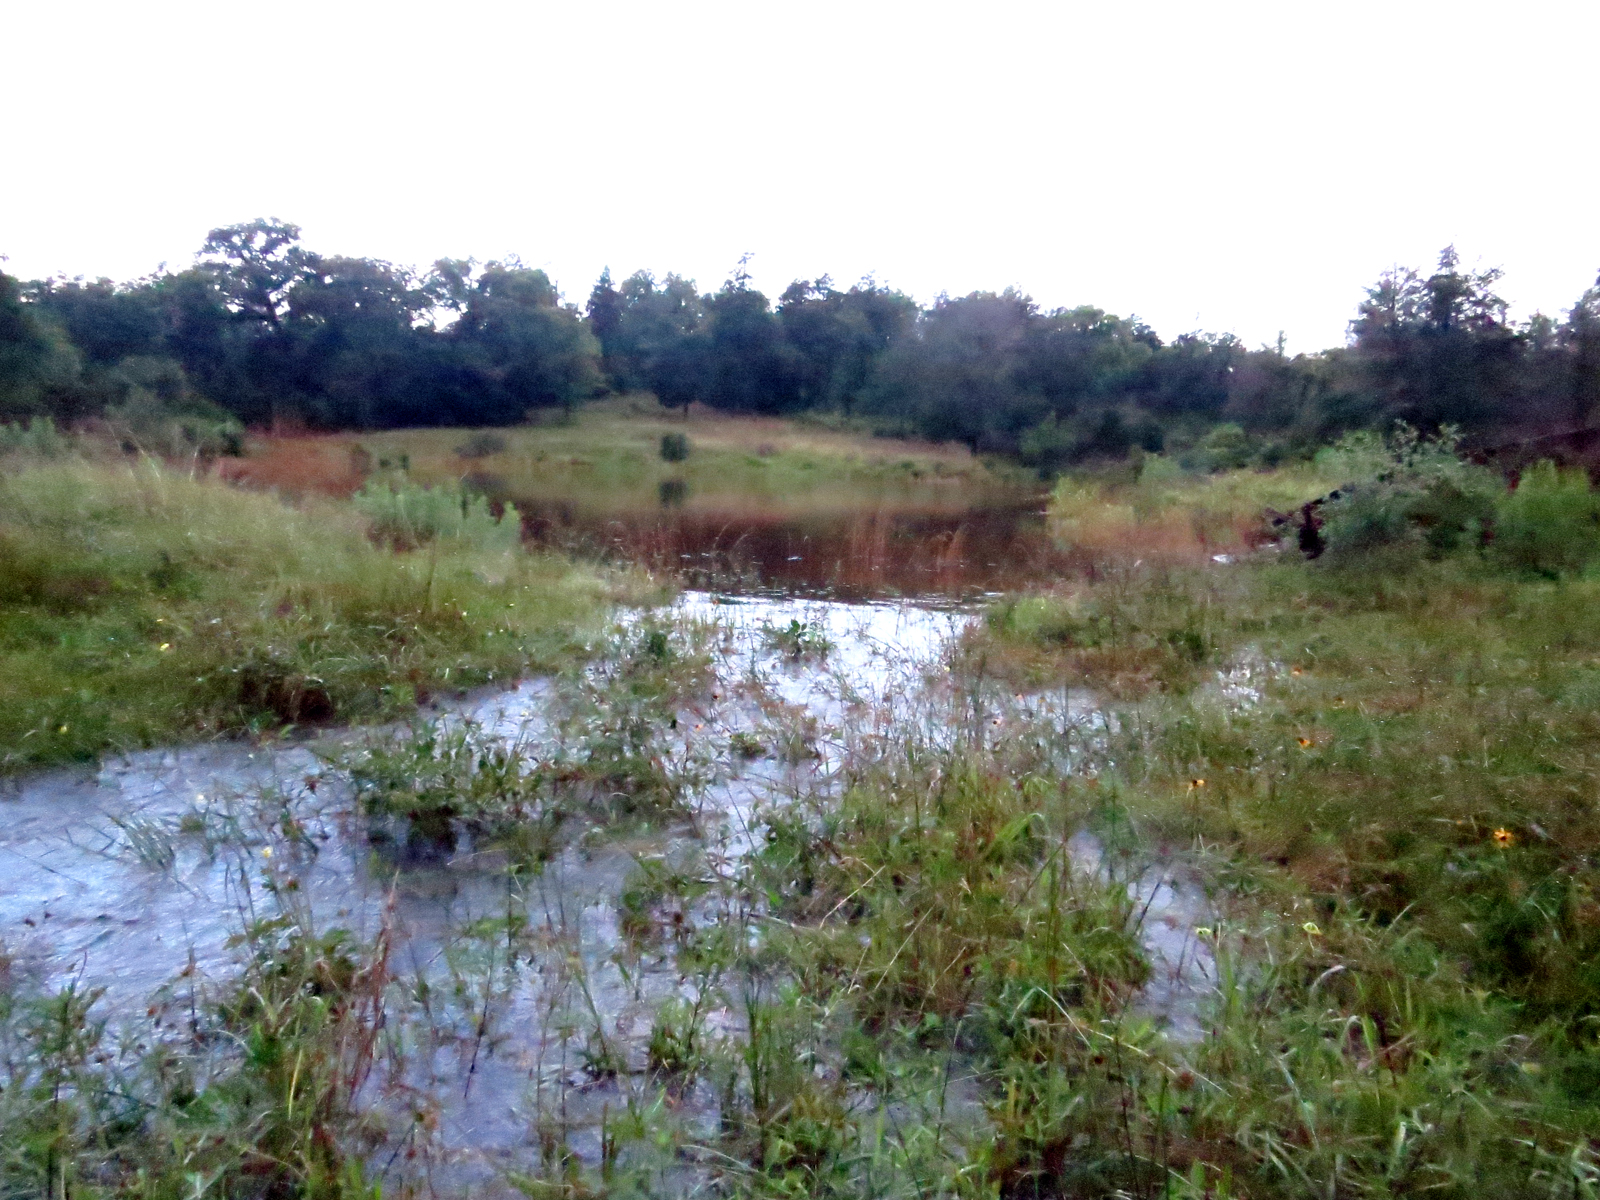
In fact our pond was running over the spillway for the first time since April of 2009 when we got 12" of rain in one day and 16" for the month. (That year also marked the beginning of a drought that had our pond dried completely up for much of 2011 and into 2012.

Here I am, with my knee-high snake boots on, standing in about 12" of water in the spillway. In April 2009 I was able to easily stand here in my hiking boots which only give me about 6" of protection.

This is taken at the head end of the pond looking upstream and is usually a dry ravine. (We're on one of the highest areas in the county so usually don't get a lot of running water here, instead we're where the water starts from.)


Normally we have two ways to get to the other side of the pond, which basically divides the front and rear sections of our acreage. We can cross on the dam or come here to the head end of the pond and walk across, maybe having to step over a little trickle. Right now the water in front of me is about 8' deep.

This May we saw a total of 15.6" of rain (The long term average for the month is 4.82") and year to date we have had 35.49" (Our long-term annual average is 40.31.) As you might imagine, the ground is saturated and now most the rainfall stays up on top as it runs down towards our pond a hundred yards or so off to the right.

This Ozark Trails 10 man tent has been up the entire month and not a drop of that rain or runoff ended up inside where we had rugs on the floor, tables on the rugs and a bunch of stuff stacked everywhere as it was being sorted out for delivery to various places. Much of the rain was accompanied by thunderstorms that were not always docile, in fact Central Texas had more tornadoes this May than the past decade of Mays combined, yet if you're familiar with this tent you might notice that none of the 6 guy lines have been deployed, (The tent was sitting in the driveway so there just wasn't room to put out the guy lines and still drive around the tent.) yet this sub $200 tent we picked up at Walmart came through with zero damage.

So what is the point of this entry??  Well it all started when I was minding my own business and stumbled across this:


Mud daubers, especially these Black and Yellow Daubers (I guess when it came time to name these guys it was late in the day, everyone just wanted to go home, and imagination had run out back there  around lunch-time.) are common around here, but the wet spring has all creatures out in abundance, including the daubers.

This trio hung around under-foot like this for well over an hour. Sometimes a marauding dauber would fly down at full speed and crash into them, knocking the stack over on it's side, but they never let go and always righted themselves. I'm not an entomologist so I can only imagine that these three are up to something I've only ever been able to fantasize about.


Now daubers are persistent little buggers, (Get it? Buggers?!) and when it comes to location for their nests, seem to prefer my stuff over whatever nature has provided. There's usually a drawer here in my lathe cart, but when I went to open it that big nest up in the top left was blocking the way.


Repeated jerking of the drawer eventually knocked the bottom of that nest off and freed the drawer, although it was full of nest bits,


Including the paralyzed spiders the daubers leave behind for the little ones to feed on once they hatch.

For some reason, even though there are gaps when the 10'x12' barn doors are closed, the daubers don't like to use them. When I close the doors in the evening the daubers trapped inside stay inside and when I open them in the morning I'm reminded of that scene in Apocalypse Now where the helicopters are attacking the beach. Swarms of the daubers are hovering just outside and for a moment there is mayhem as the ones inside wanting out collide with the ones outside wanting in, and daubers are not shy creatures so several will bounce right off me in the process.


I leave them plenty of easily accessible spots to build their nests, but do you think that's good enough for them??  No way.

This drawer in my router station fits pretty tightly, but I have to share the holes in my bit organizers with the daubers anyway.


Sometimes their choice of nest location is baffling.


This little tool organizer is for my modeling tools and it sits out in the open on my workbench,


Yet the other day I went to grab one of the tiny files there in the middle of this photo, files I had used just the day before, and found them all bound together at the exposed ends with a dauber nest. (Didn't think to take a picture before I got rid of it.)

So anyway -  while that trio of daubers was cavorting around on the floor, I took my lath cart apart and cleaned the nests out of it. The debris filled about 3" of a five gallon bucket but I threw it out before remembering to take a photo. . . But here is the cart, all cleaned up and ready for the next squadron of daubers. Wait! I think I just saw one fly in there!!!

Anyway, where was I before I was so rudely interrupted??

Oh yeah, building a mobile craft and hobby station. . . More on that in the future.


Thursday, March 12, 2015

2015 garden update


It's been a month and a half since the last garden update and what a month and a half!!

It has been grey and cold and rainy nearly every day since. I think we hit our average daily high maybe 3 or 4 times during that period, the rest of the time we were cold! Several days it never got out of the 30's.

When I started the 2015 garden I said I would probably plant another flat or two in a couple weeks to compensate for the probably optimistically early start. Well that didn't happen! I only have just so much heat-mat and grow-light room and the cold weather meant I couldn't free much of it up, not to mention scraping ice off the windshield puts a bit of a dampener on the gardening bug.


One thing I did get on was building a little water tower and installing a drip-irrigation system that uses a zero-pressure timer. As is my nature, I grabbed left overs, treated lumber and some of those old cedar fence boards, to make the tower. The proportions are wrong but it's supposed to remind you of an old railroad water tower. It took a little math and fiddling with tool setups to get the angles right on the 'tank' and building the removable roof was even more interesting.


The tank is sized for a 5 gallon bucket into the bottom of which I installed a bulk-head fitting and a boiler valve. The timer hangs off of this and gravity feeds the tubing.


A future modification will be to install a low-power solar pump to pump water, from the tank that catches rainwater off the greenhouse roof, up into the bucket. The pump will run whenever there is enough sunlight and an overflow installed in the bucket will return excess water right back to the main tank. I can potentially collect about 50 gallons for every inch of rain, so with enough rainfall that will create a perpetual watering system.


Radish, kale and lettuce, in the farthest box. The big leafy thing in the middle box is broccoli. It survived the winter but only produced a few small, but very flavorful florets that I harvested a couple at a time by bending over and biting them directly off the plant. mmmm good! But it was finished so I pulled it just after this photo.
I did move a few things out to the greenhouse the second week of February because they were getting pretty crowded under the grow light. So the radishes, letuce and kale all made it into one of the Grow-Boxes. The only protection they had during the frequent freezes was a layer of floating row cover draped over the PVC frames and held in place with spring clamps.

The average last frost around here is the first week of March and the long-range forecast shows that icy crap from the arctic finally staying up there at the top of the planet where it belongs, so, in another show of optimism I have folded up the row cover and stored it away.


Now that first batch of radishes is about a week past their expected harvest date. They look a little woody and miss-shapen in this photo but the one I sampled (pulled it up, burshed the dirt off, bit off the dangling root, spit it out and ate the radish standing right there) was pretty dang good.


The lettuce, on the right, and kale, on the left, are still 2 and 4 weeks respectively away from expected first harvest but they are going to have to do a lot of growing in a hurry to meet that deadline!!


The beans were also protected by row cover but, though they started off gangbusters, didn't do well at all, so today I planted a couple more right into one of the pots.


I also moved 4 tomato plants and three broccoli from under the grow light in the barn into pots in the greenhouse today,


along with a few sprigs of basil.


 Some additional direct-sowing of some radishes, lettuce and bunch-onion into a couple of the other Grow-boxes finished up the gardening for the day.


Wednesday, January 21, 2015

Starting the 2015 garden


I know, seems like an over abundance of optimism on my part to be starting the garden in mid January,


but the fact is, we've been feeding off of last fall's Nevada Lettuce all winter. They're getting a little ragged now, mostly because we've been pulling leaves off to the point where some of the plants are more stem than anything else, but they held up well.

We also had some Simpson Lettuce growing along side but they insisted on bolting between Thanksgiving and Christmas no mater how aggressive I was on topping off the flower stems. Once bolted the leaves of the Simpson got pretty bitter but I did leave two of them growing to see if I could get any seed out of them, (Not so far.) and both lettuces sailed through the several freezes we've had with only a few layers of floating row cover for protection.


Just for grins, late in the fall I direct planted a few Early Green Broccoli seeds in an empty spot. (For those that just turned their noses up, and you know who your are, we eat a lot of broccoli at our house. Like pretty much every day!) It was quite late in the season and a bit cold for proper germination, but this plant, which hasn't set any florets yet, sprouted then thrived despite the cold.


So I maybe got a little impatient the other day but I ended up planting a flat with radishes, a couple more broccoli, and some Nevada lettuce and set it on a heat pad under the grow light out in the barn. Within two days the lettuce had sprouted and by the next day everybody was up and growing.


So I started a second flat with Dwarf Blue Kale, Brandywine Tomatoes, and just for grins, a couple Contender Bush Beans. A few days later everybody is up.

In our zone (8) the lettuce, kale, broccoli and radishes are all considered cool weather plants which means by mid to late May they will be done, so starting them now isn't that far off the mark. The tomatoes will take a little nursing to get them through to planting time but they too suffer in the heat so a good head start will hopefully improve yield.

The beans?? Well this photo was taken one day after the first of the two beans sprouted (The other one sprouted last night.) and it's that tall plant over on the left. As you can see it has some pretty well developed true leaves on it just one day after sprouting! I'll be transplanting them into larger pots later today but I may have jumped the gun a bit on the beans!!

In a couple weeks I'll probably repeat the plantings. This way if I've been too early with some of these initial plantings all is not lost, and if I wasn't too early we will have an extended harvest to look forward to.


Sunday, January 4, 2015

An Ivy League Project


OK, maybe I should have left off that 'league' bit and just claimed it to be an an Ivy Project. (Was that mean of me to tease all you East coast college sports fans and/or intellectual snobs like that?. . . Too bad.)

I'm not very clear on just where they came from (I guess I wasn't in the loop that day.) but I ended up with a couple small Ivy plants sitting on my computer desk/shelf/standup workstation the other day. It was suggested that I find a proper pot and keep them at my station for a little greenery since I have the 10'x10' doors behind me open most the time and get fairly good light there. Being a husband of nearly 30 years (This time; the first marriage didn't work out quite so well. . .) I took that suggestion as a command and immediately looked around for something to put the poor little plants into.

Of course there's never an appropriate pot just hanging around with nothing to do when you need one is there?!

I mean I could have put the forks on the tractor and drug (I know, now days dragged is more correct but I'm not from these days.) that 24" ceramic planter in from beside the barn; you know, the one so heavy I can't even tip it up on edge and roll it without causing serious bodily harm; like the kind where my guts pop out and get stepped on; but I kind of doubt that my tall baker's rack was really built for that kind of load anyway, and I'm pretty sure the two small plants would be lost and lonely with all that acreage.

So I wandered down the hill to the equipment barn (One of those inexpensive tensioned-skin 'garages') where I have a stack of old cedar fence boards salvaged when the 20 year old fence they were once part of had to be replaced. Grabbing a few off the stack I headed back to the workshop


where I did a couple quick 'measurements' and a crude drawing.

Not wanting just a plain old box, I opted to tilt all four sides outward at a 7 degree angle. This particular angle was pretty much an arbitrary selection, except that 5 degrees is small enough that you're not quite sure if it was intentional or just sloppy workmanship, 10 degrees is just too - well - common, more than 10 and it starts looking cartoonish, so 7 it is.

First step is to rip a 7 degree edge down the length of the best looking fence board, ( Best looking in this case means the one with the most interesting aging and edge wear.)

But, Oh NO!!!! My angle gauge is dead! Push the ON button and it just sits there staring back blankly. Push it again and still nothing! Bang it into the palm of my hand and still nothing!

So I managed to waste a couple minutes at this always useless endeavor before accepting that I must have run the battery flat last time I used it.

Fortunately I had a couple spares in the battery box, otherwise I might have had to go old-school. (Oh the horror!!)


That near disaster resolved, I set the blade angle to 83 degrees and ripped my starter edge which will end up being at the bottom of each side.


Then with my miter guide set to 7 degrees I began cross-cutting the fence board into the bits I needed, careful to keep track of that 7 degree edge so it always ended up in the right place; down and outward leaning.


 Of course I managed to make the first cross-cut with the blade still cocked over at 83 degrees instead of the 90 it should have been, so I had to use one of my do-overs to fix that. (Fortunately, since it's my shop and I make the rules, I have as many do-overs as I need; and let's face it, some days are better than others. . .)


With all four sides cut to size I tilted the blade back to 83 degrees and cut a scrap piece of pine so that it would drop into the assembled sides and wedge itself there as a bottom. I used the pine because it will give more structure than the worn out fence boards. (Besides, I have plenty of leftover scraps of it on the lumber rack.) Yes, the pine will rot away faster than cedar but then this is pretty much a throw-away project anyway. If I get any more than two years out of the planter I figure I'm at least a year ahead of the game.

Of course, if this was a carefully planned and measured out endeavor I could have made all the 7 degree cuts with one setup,


but it's often best to measure right off the project pieces as you go and just leave the tape measure alone.

First I ripped the pine to width based on the finished width of the end pieces, then I cross-cut it to the length of the long pieces minus the combined thickness of the two ends.


Clamping the pine base to the workbench as a crude assembly jig, I pinned the four sides together first then finally pinned the bottom board in place. This took all of 2 or three minutes with the air-nailer.


Because this is going to sit on a shelf over top of some of my books, I draped a still folded black trash bag over the planter, tucked it in reasonably well, tacked it in place with some scrap pine strips, making sure to keep them down below what will be the soil level, and finally hacked off the excess trash bag with a blade that could have been just a little sharper, but who has time for that??

Of course I'll have to be very careful not to over-water and rot the roots, but I figure that's better than dribbling dirty plant water down over my books, one of which (Rod McKuen's, Listening to the Warm) I've had since I was a freshman in high school and a few others (A couple hiking guides and Tom Brown's exhaustively titled, Field Guide to Nature Observation and Tracking.) I've had since the early eighties.


A few scoops of potting mix from the bin outside, a little tamping and watering in, and the Ivy has a pretty nice new home, even if I say so myself.

This prototype took about an hour from concept to finish and required less than one fence board. I have over two hundred fence boards in that stack down in the equipment barn and with a few jigs and some assembly line production I figure I could turn out 6 or so planters an hour at a cost of maybe a buck apiece and they would probably sell for $9.99  over at the crafts and antiques festival as fast as I could make them. Over $50 an hour net isn't bad, but, being retired and all, where's the fun in that!!

My freshly 'greened' workstation, complete with about-to-be-grilled dinner (The grill is just warming up off to the left.) and this very blog entry on the laptop!

The workstation is made up of one full-height and one half-height baker's racks backed up to each other and a goose-neck LED floor lamp for when the barn doors are closed.

Just below the laptop is a 48" 4 bulb florescent shop light I use as a grow light when I have seedlings sitting on the shelf below it. I have room for another grow-light setup below that but for now my keyboard (Music not data entry.) sits down there.

The binoculars and camera are always sitting here, right at hand as well, (Of course the camera is, in fact, in my hand at this moment. . .) as are a number of field guides and other reference books.

The top shelf of the tall rack has a few stray projects sitting on it and the shelf with the new planter is also where I keep a stack of puzzles handy because - well - a guy needs handy puzzles.

It might not look like much but my workstation works out pretty dang well for me and now even has live plants! (I wonder if they'll stay that way. . .)